Next.js SaaS Starter
This is a starter template for building a SaaS application using Next.js with support for authentication, Stripe integration for payments, and a dashboard for logged-in users.
Demo: https://next-saas-start.vercel.app/
Well, it's almost 2025 and React 19 has brought so many amazing new features I didn't predict! This repo is a demonstration of the latest React and Next.js patterns. These patterns can drastically simplify some common tasks in building your SaaS, like building forms, talking to your database, and more.
For example, React now has built in hooks like useActionState to handle inline form errors and pending states. React Server Actions can replace a lot of boilerplate code needed to call an API Route from the client-side. And finally, the React use hook combined with Next.js makes it incredibly easy to build a powerful useUser() hook.
We're able to fetch the user from our Postgres database in the root layout, but not await the Promise. Instead, we forward the Promise to a React context provider, where we can "unwrap" it and awaited the streamed in data. This means we can have the best of both worlds: easy code to fetch data from our database (e.g. getUser()) and a React hook we can use in Client Components (e.g. useUser()).
Fun fact: the majority of the UI for this application was built with v0 🤯 More details here if you want to learn about this repo.
Features
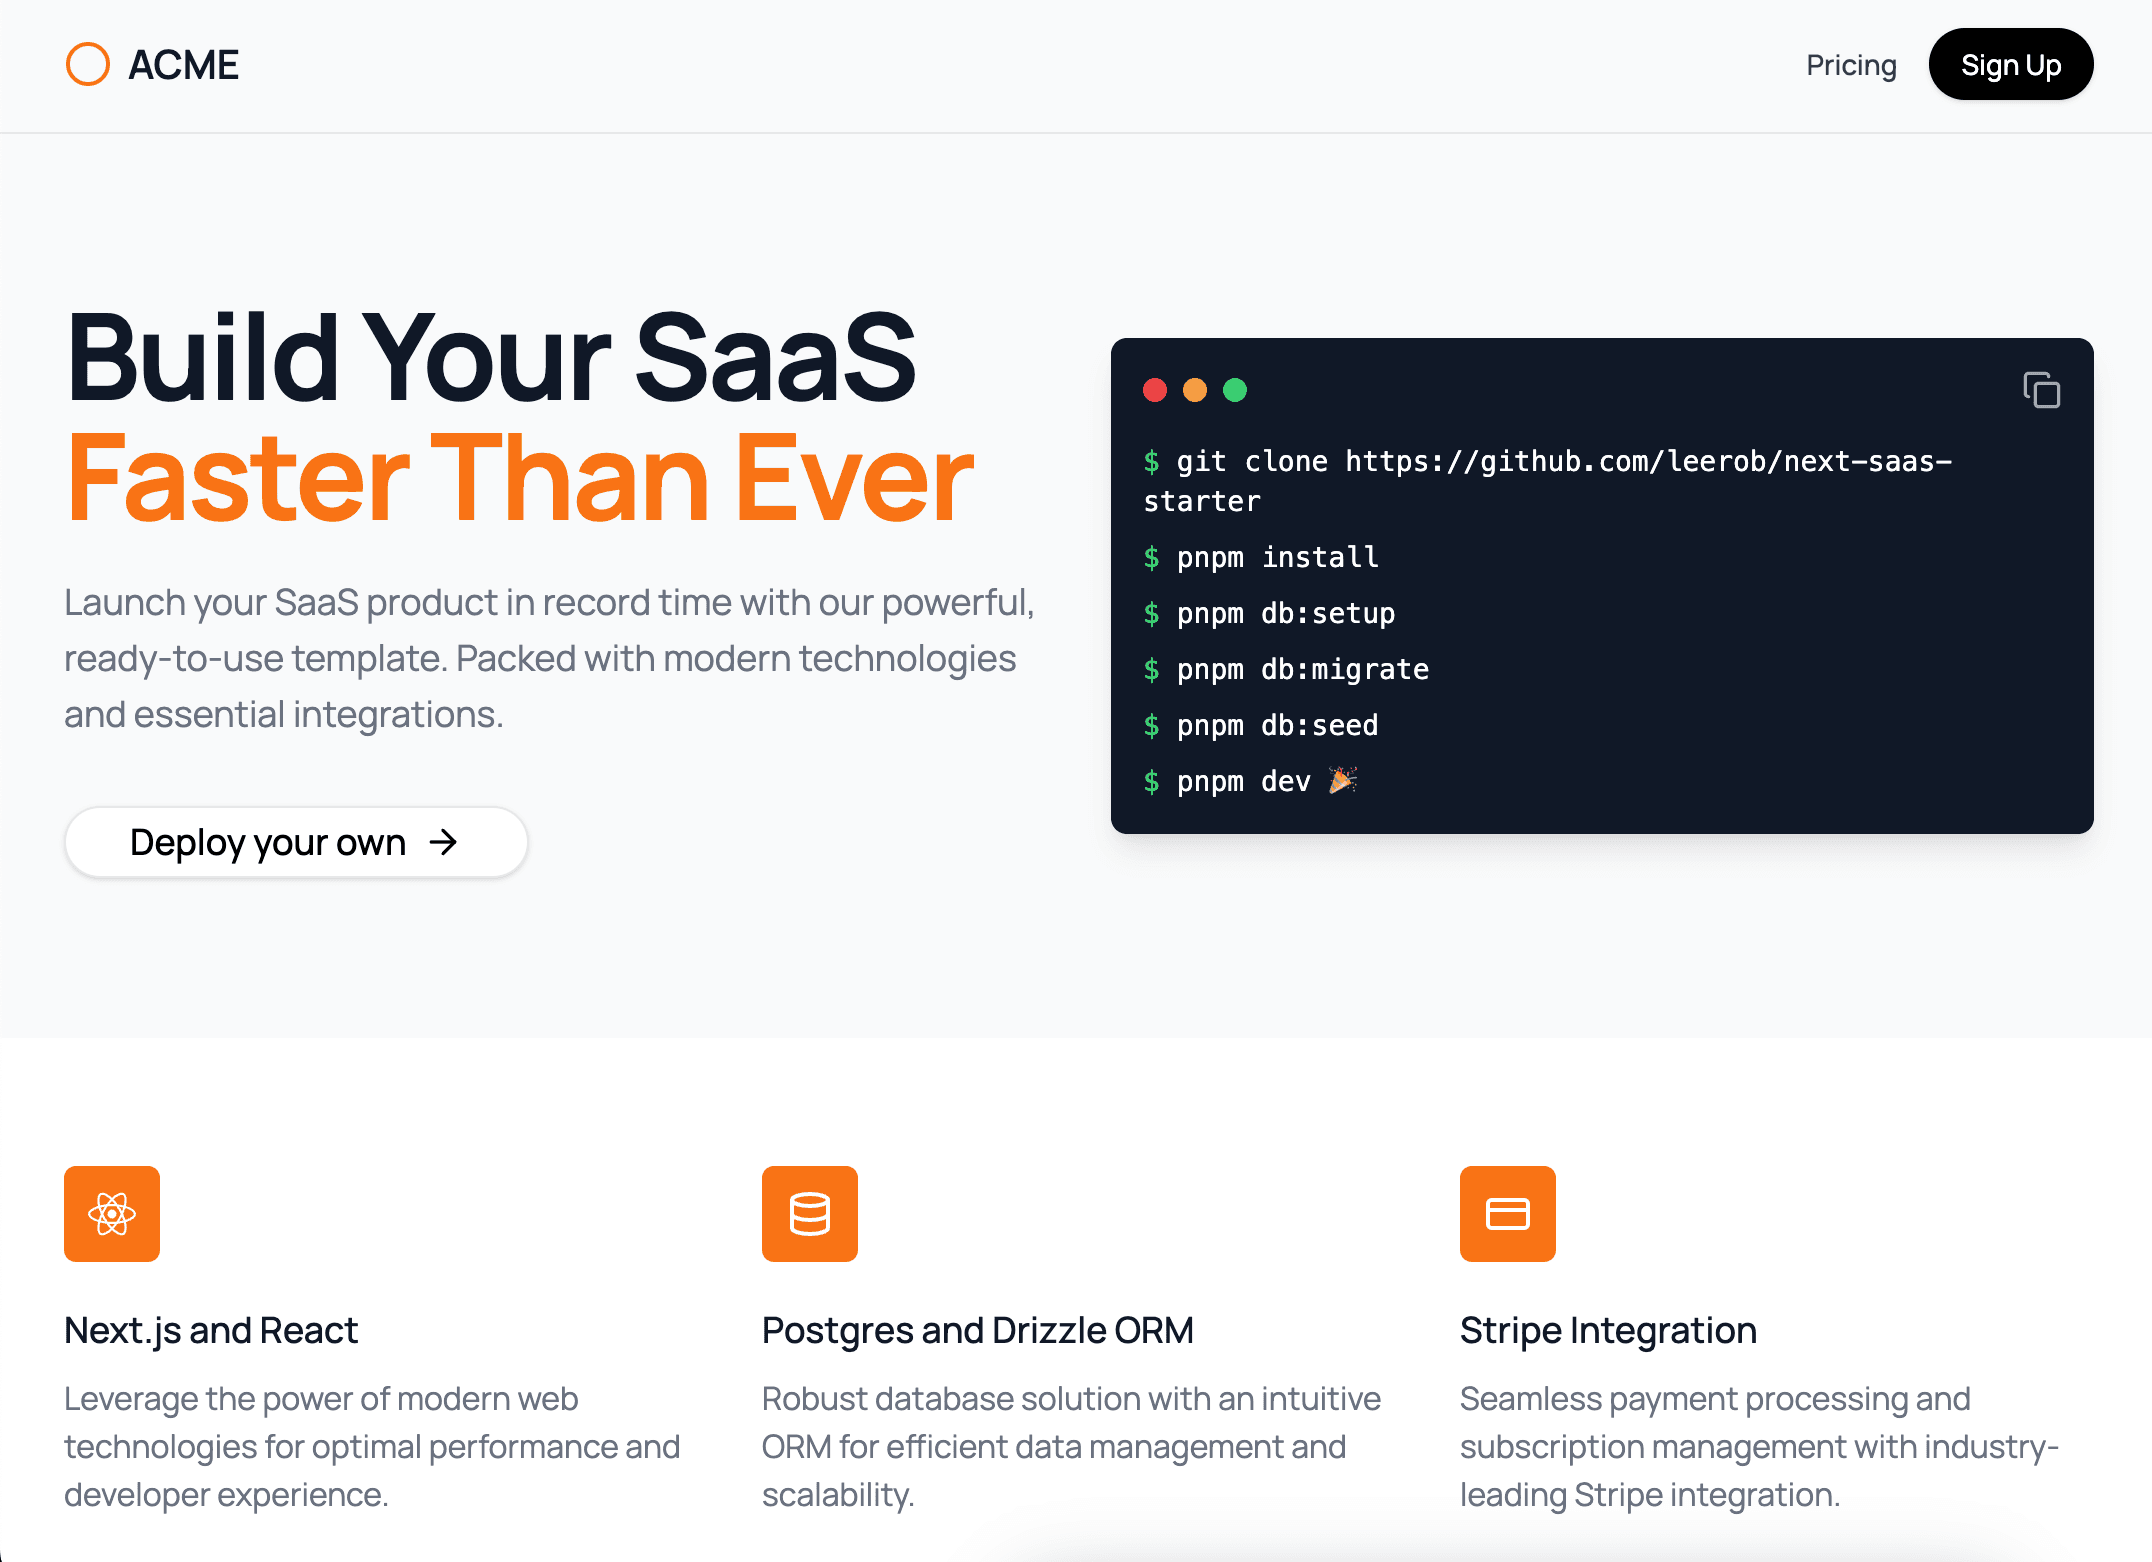
- Marketing landing page (
/) with animated Terminal element - Pricing page (
/pricing) which connects to Stripe Checkout - Dashboard pages with CRUD operations on users/teams
- Basic RBAC with Owner and Member roles
- Subscription management with Stripe Customer Portal
- Email/password authentication with JWTs stored to cookies
- Global middleware to protect logged-in routes
- Local middleware to protect Server Actions or validate Zod schemas
- Activity logging system for any user events
Tech Stack
Getting Started
Running Locally
Use the included setup script to create your .env file:
Then, run the database migrations and seed the database with a default user and team:
This will create the following user and team:
- User:
test@test.com - Password:
admin123
You can, of course, create new users as well through /sign-up.
Finally, run the Next.js development server:
Open http://localhost:3000 in your browser to see the app in action.
Optionally, you can listen for Stripe webhooks locally through their CLI to handle subscription change events:
Testing Payments
To test Stripe payments, use the following test card details:
- Card Number:
4242 4242 4242 4242 - Expiration: Any future date
- CVC: Any 3-digit number
Going to Production
When you're ready to deploy your SaaS application to production, follow these steps:
Set up a production Stripe webhook
- Go to the Stripe Dashboard and create a new webhook for your production environment.
- Set the endpoint URL to your production API route (e.g.,
https://yourdomain.com/api/stripe/webhook). - Select the events you want to listen for (e.g.,
checkout.session.completed,customer.subscription.updated).
Deploy to Vercel
- Push your code to a GitHub repository.
- Connect your repository to Vercel and deploy it.
- Follow the Vercel deployment process, which will guide you through setting up your project.
Add environment variables
In your Vercel project settings (or during deployment), add all the necessary environment variables. Make sure to update the values for the production environment, including:
BASE_URL: Set this to your production domain.STRIPE_SECRET_KEY: Use your Stripe secret key for the production environment.STRIPE_WEBHOOK_SECRET: Use the webhook secret from the production webhook you created in step 1.POSTGRES_URL: Set this to your production database URL.AUTH_SECRET: Set this to a random string.openssl rand -base64 32will generate one.
Other Templates
While this template is intentionally minimal and to be used as a learning resource, there are other paid versions in the community which are more full-featured:
Next.js SaaS Starter
This is a starter template for building a SaaS application using Next.js with support for authentication, Stripe integration for payments, and a dashboard for logged-in users.
Demo: https://next-saas-start.vercel.app/
Well, it's almost 2025 and React 19 has brought so many amazing new features I didn't predict! This repo is a demonstration of the latest React and Next.js patterns. These patterns can drastically simplify some common tasks in building your SaaS, like building forms, talking to your database, and more.
For example, React now has built in hooks like useActionState to handle inline form errors and pending states. React Server Actions can replace a lot of boilerplate code needed to call an API Route from the client-side. And finally, the React use hook combined with Next.js makes it incredibly easy to build a powerful useUser() hook.
We're able to fetch the user from our Postgres database in the root layout, but not await the Promise. Instead, we forward the Promise to a React context provider, where we can "unwrap" it and awaited the streamed in data. This means we can have the best of both worlds: easy code to fetch data from our database (e.g. getUser()) and a React hook we can use in Client Components (e.g. useUser()).
Fun fact: the majority of the UI for this application was built with v0 🤯 More details here if you want to learn about this repo.
Features
- Marketing landing page (
/) with animated Terminal element - Pricing page (
/pricing) which connects to Stripe Checkout - Dashboard pages with CRUD operations on users/teams
- Basic RBAC with Owner and Member roles
- Subscription management with Stripe Customer Portal
- Email/password authentication with JWTs stored to cookies
- Global middleware to protect logged-in routes
- Local middleware to protect Server Actions or validate Zod schemas
- Activity logging system for any user events
Tech Stack
Getting Started
Running Locally
Use the included setup script to create your .env file:
Then, run the database migrations and seed the database with a default user and team:
This will create the following user and team:
- User:
test@test.com - Password:
admin123
You can, of course, create new users as well through /sign-up.
Finally, run the Next.js development server:
Open http://localhost:3000 in your browser to see the app in action.
Optionally, you can listen for Stripe webhooks locally through their CLI to handle subscription change events:
Testing Payments
To test Stripe payments, use the following test card details:
- Card Number:
4242 4242 4242 4242 - Expiration: Any future date
- CVC: Any 3-digit number
Going to Production
When you're ready to deploy your SaaS application to production, follow these steps:
Set up a production Stripe webhook
- Go to the Stripe Dashboard and create a new webhook for your production environment.
- Set the endpoint URL to your production API route (e.g.,
https://yourdomain.com/api/stripe/webhook). - Select the events you want to listen for (e.g.,
checkout.session.completed,customer.subscription.updated).
Deploy to Vercel
- Push your code to a GitHub repository.
- Connect your repository to Vercel and deploy it.
- Follow the Vercel deployment process, which will guide you through setting up your project.
Add environment variables
In your Vercel project settings (or during deployment), add all the necessary environment variables. Make sure to update the values for the production environment, including:
BASE_URL: Set this to your production domain.STRIPE_SECRET_KEY: Use your Stripe secret key for the production environment.STRIPE_WEBHOOK_SECRET: Use the webhook secret from the production webhook you created in step 1.POSTGRES_URL: Set this to your production database URL.AUTH_SECRET: Set this to a random string.openssl rand -base64 32will generate one.
Other Templates
While this template is intentionally minimal and to be used as a learning resource, there are other paid versions in the community which are more full-featured:


